Crazy larry Posted June 3, 2015 Report Share Posted June 3, 2015 trip to Costco Dog food Run Link to comment Share on other sites More sharing options...
starquestJOE Posted June 4, 2015 Report Share Posted June 4, 2015 Fighting a clutch issue. But it runs again Link to comment Share on other sites More sharing options...
Woody Posted June 5, 2015 Report Share Posted June 5, 2015 I finished installing the MR2 shocks with coilovers and Camber plates with Stainless steel braided brake lines. This is as high as my car will go. Roughly 200mm from road to bottom of side skirt. Link to comment Share on other sites More sharing options...
importwarrior Posted June 5, 2015 Report Share Posted June 5, 2015 hydroplaned all the way to work.suns out now should make for a better drive home!!! Link to comment Share on other sites More sharing options...
D-VO Posted June 5, 2015 Report Share Posted June 5, 2015 Cleaned up all the tools around it, and oven cleanered the heads... and took out the 4 boxes of trash sitting next to it. Link to comment Share on other sites More sharing options...
mbruneaux Posted June 6, 2015 Report Share Posted June 6, 2015 What coilovers did you use? Ground control or Cosmo? Link to comment Share on other sites More sharing options...
mbruneaux Posted June 6, 2015 Report Share Posted June 6, 2015 Replaced the injector clips that the PO had installed and cleaned the contacts, runs much better. Link to comment Share on other sites More sharing options...
polarisman14 Posted June 6, 2015 Report Share Posted June 6, 2015 Just to catch everyone up to speed, I'm pulling my motor to stop it from using so much oil. Half of it is going out through the gaskets, and the other half of it is being burnt due to bad oil separator/PCV and valve stem seals. 5/31; Pulled the engine from the car after draining all fluids and pulling the radiator. Cracked the engine and trans apart. Total time: 4 hours w/2 people working. 6/2: Got engine on the engine stand and started disassembling.Removed clutch, timing cover, and all accessories from the block. Time: 2 hours w/1 person working. 6/4: Tore the engine down to the bare block, separating the head in the process. Thoroughly cleaned the engine with foaming and jet-spray degreaser, then washed it and fogged it with WD-40 to wait for paint. Total time, 2 hours w/2 people working. Today (6/6): Clean WD-40 off the block throughly with brake cleaner. Mask off timing area, oil pan area, and where the block meets the head. Clean and reintall balance shaft cover. Paint with black VHT engine enamel. If time permits, tear down head 1 valve at a time, using lapping compound to clean up valve and valve seat quickly and gently and reinstall valve with fresh valve stem seals. Total time: 4 hours w/2 people working. Link to comment Share on other sites More sharing options...
TexasQuest Posted June 6, 2015 Report Share Posted June 6, 2015 Got another battery. Link to comment Share on other sites More sharing options...
Sleepin Posted June 7, 2015 Report Share Posted June 7, 2015 Cleaned the garage in anticipation of picking up my car. Wife is less than pleased to know her Tundra will be exiled to the driveway. Wanted to pick up the car today, but the constant rain prevented that. Neither the current owner or I want to drive the Starion in the rain. Link to comment Share on other sites More sharing options...
93 GSX TURBO Posted June 7, 2015 Report Share Posted June 7, 2015 Made a new fuel line for my 89 and replaced the Fuel Filter Link to comment Share on other sites More sharing options...
Woody Posted June 7, 2015 Report Share Posted June 7, 2015 What coilovers did you use? Ground control or Cosmo? It was an australian brand. Not sure which one. Link to comment Share on other sites More sharing options...
polarisman14 Posted June 7, 2015 Report Share Posted June 7, 2015 Had some difficulty yesterday getting the valve spring retainers out so we scrapped that project for another day. The block is painted, though, along with the water pump, timing cover, and oil pan. Valve cover is prepped for powdercoat as is the balance shaft projection cover for the timing cover and the water pump pulley. Going with gold. I ripped my oil pan gasket taking it out of the packaging so I have a new one of those on order along with the valve cover grommets. I am hoping they come with the new metal washers over the top of them as I overtorqued them in the past and they just don't look too great. Link to comment Share on other sites More sharing options...
PDodson Posted June 14, 2015 Report Share Posted June 14, 2015 made a home made paint boothhttp://i43.photobucket.com/albums/e394/XLR8N/Mobile%20Uploads/20150613_161404_zpshtealoc7.jpghttp://i43.photobucket.com/albums/e394/XLR8N/Mobile%20Uploads/20150613_161422_zps79s9l3rr.jpghttp://i43.photobucket.com/albums/e394/XLR8N/Mobile%20Uploads/20150613_200301_zpsjkzcnztm.jpg 1 Link to comment Share on other sites More sharing options...
mstieg Posted June 14, 2015 Report Share Posted June 14, 2015 (edited) Fri: Added amp signal line to acc. fuse block for later (saw it dangling still). Checked gauge wiring. Completed elec fuel press. install. Dropped off AC compressor for check/rebuild. Measured for donor condenser to fit from who only knows what random vehicle. Crossed fingers. Sat: Pulled new gauge cluster out & apart to reset turn signal bulb arrow cover that fell crooked behind gauge plate. Reinstalled. Set JB Weld molding for 5 busted screw mounts on parking light switch covers & shroud. Hope it works. Observed Gil finish line lock for front brakes. Fan wiring & relay done. Edited June 14, 2015 by mstieg Link to comment Share on other sites More sharing options...
Turbo Cary Posted June 14, 2015 Report Share Posted June 14, 2015 Bought the foam to redo my Blower motor box and blend door box assemblies. Getting ready to convert it from digital to manual hvac controls. Link to comment Share on other sites More sharing options...
importwarrior Posted June 15, 2015 Report Share Posted June 15, 2015 Foam insulated the gaps in my fan shroud.Sealed tight now.Also filled the gaps between radiator and rad support. Link to comment Share on other sites More sharing options...
G54Bstore Posted June 15, 2015 Report Share Posted June 15, 2015 fixed the ac and actuator to blow cold air directly.. in yo FACE!unclogged the ac drain line. cool and happy happy happy Link to comment Share on other sites More sharing options...
G54Bstore Posted June 15, 2015 Report Share Posted June 15, 2015 installed a kicker 12 and some kenwood 5 1/4 s in rear dash and front dash with some small tweeters on the front pillars. got a crossover with 2 amps hooked up .BOSS amps are pretty nice and affordable. im happy with them. sounds pretty amazing Link to comment Share on other sites More sharing options...
PDodson Posted June 15, 2015 Report Share Posted June 15, 2015 finally getting somewhere with Macihttp://i43.photobucket.com/albums/e394/XLR8N/Mobile%20Uploads/20150614_190547_zpstoxrskhx.jpghttp://i43.photobucket.com/albums/e394/XLR8N/Mobile%20Uploads/20150614_191132_zpswqzcfgez.jpghttp://i43.photobucket.com/albums/e394/XLR8N/Mobile%20Uploads/20150614_192650_zpskhl1nofg.jpghttp://i43.photobucket.com/albums/e394/XLR8N/Mobile%20Uploads/20150614_192658_zpsfpvwv20u.jpg Link to comment Share on other sites More sharing options...
Sleepin Posted June 15, 2015 Report Share Posted June 15, 2015 Pulled the heat shielding off of the hood and cleaned underneath it. I also cleaned the shielding. It came out great IMO. http://i171.photobucket.com/albums/u307/Sleepin1974/75EBBD72-CE66-4142-8EB5-EBE6D2C67A90_zpsq58ojsqj.jpg Link to comment Share on other sites More sharing options...
importwarrior Posted June 15, 2015 Report Share Posted June 15, 2015 looks like new! Link to comment Share on other sites More sharing options...
mbruneaux Posted June 15, 2015 Report Share Posted June 15, 2015 Beautiful, I can't imagine how many hours it took to get to this point. Link to comment Share on other sites More sharing options...
MikeMeyerhoff Posted June 16, 2015 Report Share Posted June 16, 2015 91K struts going bye bye. Also, trying to figure out what rim/tire sizes I can run on the flatty. http://www.starquestclub.com/forum/uploads/gallery/album_1144/gallery_2764_1144_57237.jpg Link to comment Share on other sites More sharing options...
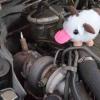
speedyquest Posted June 16, 2015 Report Share Posted June 16, 2015 Who the hell cut a hole in my hood?!!!! http://i.imgur.com/Ske3r3C.jpg Link to comment Share on other sites More sharing options...
Recommended Posts