autotr8er2 Posted June 3, 2015 Author Report Share Posted June 3, 2015 Harbor freight tubing notcher gave out after 10 cuts. Exchanged it for another one. The bronze bushing kept coming out. Sloppy cuts. Link to comment Share on other sites More sharing options...
autotr8er2 Posted June 3, 2015 Author Report Share Posted June 3, 2015 (edited) Any particular reason for going driver high to passenger low on the diag brace? Most run them the opposite way to give more helmet clearance.If by chance I land on the roof, I want to ensure any collapse / energy absorption will occur on the other side of the car. It's also set at a 45 degree angle. Optimum angle for strength. Edited June 3, 2015 by autotr8er2 Link to comment Share on other sites More sharing options...
autotr8er2 Posted June 4, 2015 Author Report Share Posted June 4, 2015 Ordered these seats. Not my photo, but it is this seat. Corbeau RRBs http://i1123.photobucket.com/albums/l543/autotr8er/seat.jpg Link to comment Share on other sites More sharing options...
Chromedome Posted June 4, 2015 Report Share Posted June 4, 2015 Man this build is awesome. I love the fact that you are taking the time to keep us updated as well as you have. Keep up the good work! 1 Link to comment Share on other sites More sharing options...
autotr8er2 Posted June 4, 2015 Author Report Share Posted June 4, 2015 (edited) Thanks, Chrome. I was beginning to think I was boring all of you with the details.the feedback I get keeps me motivated. Edited June 4, 2015 by autotr8er2 1 Link to comment Share on other sites More sharing options...
BOHO Posted June 4, 2015 Report Share Posted June 4, 2015 Only thread I get on a check daily. Really great build, looking forward to the finished product. 1 Link to comment Share on other sites More sharing options...
autotr8er2 Posted June 5, 2015 Author Report Share Posted June 5, 2015 (edited) Roll cage will be orange. It is the new black http://i1123.photobucket.com/albums/l543/autotr8er/Mobile%20Uploads/936C981D-F0C1-48A3-8908-9B359E41242B.jpg Edited June 5, 2015 by autotr8er2 Link to comment Share on other sites More sharing options...
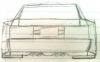
autotr8er2 Posted June 5, 2015 Author Report Share Posted June 5, 2015 (edited) Inner Sills are painted to slow the rust. This area will not be seen. It will be behind the frame rails so color wasn't a concern. http://i1123.photobucket.com/albums/l543/autotr8er/Mobile%20Uploads/06103BEC-AC87-4FC0-9C60-6910881DD4FE.jpg Edited June 5, 2015 by autotr8er2 Link to comment Share on other sites More sharing options...
autotr8er2 Posted June 5, 2015 Author Report Share Posted June 5, 2015 Floor panels will be made from 3/4" aluminum honeycomb panels. Bonded and riveted to the fram rails Link to comment Share on other sites More sharing options...
BOHO Posted June 5, 2015 Report Share Posted June 5, 2015 What part of OK are you in? I lived in Altus for 6 years. Link to comment Share on other sites More sharing options...
autotr8er2 Posted June 5, 2015 Author Report Share Posted June 5, 2015 Howdy, former neighbor. I'm in Lawton. Link to comment Share on other sites More sharing options...
Xtreme Industries Posted June 5, 2015 Report Share Posted June 5, 2015 the orange cage is a nice complimentary color, looks awesome. 1 Link to comment Share on other sites More sharing options...
autotr8er2 Posted June 5, 2015 Author Report Share Posted June 5, 2015 Thanks, I struggled for a while on what color to go with Link to comment Share on other sites More sharing options...
autotr8er2 Posted June 11, 2015 Author Report Share Posted June 11, 2015 It's here! Perfect, snug fit. Need to lose a couple more pounds. http://i1123.photobucket.com/albums/l543/autotr8er/Mobile%20Uploads/6922B8FA-24EC-4698-B7E2-86ED62E22660.jpg Link to comment Share on other sites More sharing options...
importwarrior Posted June 12, 2015 Report Share Posted June 12, 2015 those look like they will hold you nicely. Link to comment Share on other sites More sharing options...
autotr8er2 Posted June 12, 2015 Author Report Share Posted June 12, 2015 (edited) They are comfortable as well. So the next steps.... 1. re-engineer the drive-line mounting points. Having to flip the bolt (which are welded in) and nut arrangement. The nuts will be welded to the frame and the bolts will be securing the drive-line. 2. Install the floor. Using 3/4" aluminum honeycomb for the flooring material. This will be secured by adhesive and rivets. Crossmembers will be installed for strength and to secure the seats.3. Install the pedals and Steering column (get the position right)4. Install the seats. (get the position right)5. Finish the Roll cage. (Fabrication & paint) 6. Fabricate Rear shock mounts and Install/Test. 7. Fabricate Front shock mounts -7 a. Order what I need7 b. Install8. Weld body to the frame Finally a roller!!! 9. Run brake lines10. Finish Modifying the front fenders11. Modify the Rear Fenders12. Fabricate the Firewall - need to make room for the A/C13. Fabricate the wheel wells/inner fenders/tubs (Front & Rear)14. Wiring for the Engine/Transmission (computer) -14 a. Fuel system install/plumbing.14 b. Get her fired up. Whoot!15. Install the Hydroboost brake system16. Interior - (big list)17. Fabricate the over-fenders18. Electrical (Wiring)19. Glass (new windshield)20. Paint. 21. Shred tires. Phew! I'm still not done. Edited June 12, 2015 by autotr8er2 Link to comment Share on other sites More sharing options...
Convette Posted June 12, 2015 Report Share Posted June 12, 2015 why hydroboost? Link to comment Share on other sites More sharing options...
autotr8er2 Posted June 12, 2015 Author Report Share Posted June 12, 2015 Space, just don't have it Link to comment Share on other sites More sharing options...
mbruneaux Posted June 12, 2015 Report Share Posted June 12, 2015 VX2000? Very nice. 1 Link to comment Share on other sites More sharing options...
NikoFab Posted June 13, 2015 Report Share Posted June 13, 2015 Roll cage will be orange. It is the new black My wife loves that show 1 Link to comment Share on other sites More sharing options...
autotr8er2 Posted June 14, 2015 Author Report Share Posted June 14, 2015 Ha. Forgot about that... Link to comment Share on other sites More sharing options...
autotr8er2 Posted June 15, 2015 Author Report Share Posted June 15, 2015 Got # 1 complete. That was a chore!!! Link to comment Share on other sites More sharing options...
stariondreams Posted June 19, 2015 Report Share Posted June 19, 2015 Looking at those pictures I'm really curious, how the hell do you weld those tubes fully if you don't have the ability to lift the body away from them like you do? Do they just make enough space to get the welder in there? Not sure if you ever got the answer. but anyway what you do is . drill a 3" hole in the floor with i hole saw right were the hoop sits. be careful of gas and brake lines under the car. Now the metal plates slide on top of the hole you drilled .Tac weld your cage slide out plates and drop cage down. Now weld the tops.Slide up slide in plates weld plates. Job done. 1 Link to comment Share on other sites More sharing options...
Convette Posted July 9, 2015 Report Share Posted July 9, 2015 Updates? Link to comment Share on other sites More sharing options...
Menesing Drifter Posted July 9, 2015 Report Share Posted July 9, 2015 ^ this! Link to comment Share on other sites More sharing options...
Recommended Posts