StallionProject86 Posted June 12, 2011 Report Share Posted June 12, 2011 Progress, progress. Nice. Link to comment Share on other sites More sharing options...
88_Conquest_TSI Posted June 13, 2011 Report Share Posted June 13, 2011 heck yeah man, looks awesome. i was about to do this same swap into my conquest until i was given a different engine for my swap. Love the progress and keep up the great work man. Link to comment Share on other sites More sharing options...
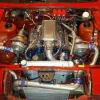
Frenchi934 Posted July 8, 2011 Report Share Posted July 8, 2011 is the 6g72 an aluminum or iron block? What does it weigh compared to a g54b? or even a 1uzfe? Not that any of that matters to someone looking for pure horsepower, but I was just curious if you knew I love this motor swap and your work Link to comment Share on other sites More sharing options...
Bill Hincher Posted July 8, 2011 Report Share Posted July 8, 2011 its a cast block but it just looks massive >;o) I have a set of scales, I can wiegh the whole car and compare it to the 4G63, but I am so painfully slowwwwwwwwwwwwwwwwww Link to comment Share on other sites More sharing options...
Blue Posted July 9, 2011 Report Share Posted July 9, 2011 its a cast block but it just looks massive >;o) I have a set of scales, I can wiegh the whole car and compare it to the 4G63, but I am so painfully slowwwwwwwwwwwwwwwwwwPrice of getting younger, right? Loving this swap, but I thought this was an aluminum block? Link to comment Share on other sites More sharing options...
Bag-O-Chips Posted July 9, 2011 Report Share Posted July 9, 2011 I sooooooo want this!!! Link to comment Share on other sites More sharing options...
button Posted July 11, 2011 Report Share Posted July 11, 2011 87blue, no sir, mitsu has used cast iron blocks up until 2005 concept cars and 2007 production, the lancer evolution x I believe was the first mitsu with an aluminum block. Link to comment Share on other sites More sharing options...
Blue Posted July 11, 2011 Report Share Posted July 11, 2011 87blue, no sir, mitsu has used cast iron blocks up until 2005 concept cars and 2007 production, the lancer evolution x I believe was the first mitsu with an aluminum block. Link to comment Share on other sites More sharing options...
DJpowerHaus Posted July 27, 2011 Report Share Posted July 27, 2011 This is looking great. Im excited that Bill is involved too. I hope to see more DOHC Mitsubishi V6 RWD swaps in the future. Sooooo tempting. If you need any wiring info or anything I can help with, please ask. Link to comment Share on other sites More sharing options...
Bill Hincher Posted August 10, 2011 Report Share Posted August 10, 2011 (edited) http://www.billsautofab.com/images/6G72GMadapter64.jpg http://www.billsautofab.com/images/6G72GMadapter65.jpgyou have to be flexable, this is a punch converted to a shrinker, this uses a set of merchant shirinker jaws, anytime you create a bend in metal, you are just moving it, so the displaced metal puts a curve in your flat plate, these shrinkers straigten out that curvehttp://www.billsautofab.com/images/6G72GMadapter66.jpghttp://www.billsautofab.com/images/6G72GMadapter67.jpgthis is the new coupler, it is a straigt pass through for the flywheel bolts, I found ARP bolts for this aplicationhttp://www.billsautofab.com/images/6G72GMadapter70.jpghttp://www.billsautofab.com/images/6G72GMadapter71.jpg to help the offset required to place the converter back spacing to flex about .060 and put more shrink into the outer edge of the flex plate, I built a small press and moved the hole perches out about an 1/8th inhttp://www.billsautofab.com/images/6G72GMadapter72.jpghttp://www.billsautofab.com/images/6G72GMadapter73.jpgyou can just make out the Ford torque converter nose in the center of the crankshaft couplerhttp://www.billsautofab.com/images/6G72GMadapter74.jpghttp://www.billsautofab.com/images/6G72GMadapter75.jpgthis is why the ford converter was chosen, the bolt pattern for the torque converter is 1/4 inch smaller then the GM conveter, this is a seletion of over counter parts that are a close fit Edited August 10, 2011 by Bill Hincher Link to comment Share on other sites More sharing options...
Blue Posted August 11, 2011 Report Share Posted August 11, 2011 Bill, what would it take if say, some one wanted to do this swap with a manual instead of a automatic? You can PM so we don't dirty up the thread. Link to comment Share on other sites More sharing options...
OBSESSIVE_ENT. Posted August 11, 2011 Report Share Posted August 11, 2011 man i wish i had tools like you guys great work .. oh yeh paula dean can get it! something about the phrase "hi yall" gets me goin lol Link to comment Share on other sites More sharing options...
Bill Hincher Posted August 12, 2011 Report Share Posted August 12, 2011 Bill, what would it take if say, some one wanted to do this swap with a manual instead of a automatic? You can PM so we don't dirty up the thread. yeah, I bought a clutch/flywheel set up out of a stealth 3000 off E bay last week and took a look at it, I gotta decide on which trans to use and then work out the details the R 154 is getting harder to find, the T 5 would be my next chioce, because you could also use the TKO 's and no dont bring up the T 56, I dont want to hear it I am pretty close on this project, then I have to mate the C4 to the wide block, I am working on the 4AG Toyota engine and I am doing a Honda KA set up, plus I still build all my other stuff and work my day job, so I been a little slow lately Link to comment Share on other sites More sharing options...
Bill Hincher Posted August 14, 2011 Report Share Posted August 14, 2011 (edited) an inch is as good as a mile when you are in chargehttp://www.billsautofab.com/images/6G72GMadapter77.jpg http://www.billsautofab.com/images/6G72GMadapter78.jpg http://www.billsautofab.com/images/6G72GMadapter79.jpg after the flexplate and its location was settled on, I could place the starter in the systemI knew placing the starter would be the toughest part of the build, so I moved ot around many times before I decided on the placement, this is a neet little puzzlehttp://www.billsautofab.com/images/6G72GMadapter85.JPG http://www.billsautofab.com/images/6G72GMadapter80.JPGhttp://www.billsautofab.com/images/6G72GMadapter81.JPG http://www.billsautofab.com/images/6G72GMadapter82.JPG because this is a reverse starter system and because I used the largest diameter ring gear as I could to fit between the two lower bellhousing bolts, I had to place the starter in the location I could get closest to the ring gear and furthest from the transmission housing I wanted to keep the starter as high as I could to clear the headershttp://www.billsautofab.com/images/6G72GMadapter83.JPG http://www.billsautofab.com/images/6G72GMadapter84.JPG Edited August 14, 2011 by Bill Hincher Link to comment Share on other sites More sharing options...
Blue Posted August 14, 2011 Report Share Posted August 14, 2011 Ah Bill, you always amaze me. Looking good, man. Now... about that T56... LOL :lol: A TKO would be awesome. Link to comment Share on other sites More sharing options...
Bill Hincher Posted August 18, 2011 Report Share Posted August 18, 2011 (edited) I had to assemble the front pump to make sure of the final depth of the bellhousinghttp://www.billsautofab.com/images/6G72RWDconversionengineswapbellhousing1.jpg http://www.billsautofab.com/images/6G72RWDconversionengineswapbellhousing2.jpghttp://www.billsautofab.com/images/6G72RWDconversionengineswapbellhousing.jpg http://www.billsautofab.com/images/6G72RWDconversionengineswapbellhousing3.jpg you can see why the starter was located in the housing because everything was so tight but it all fits neatlyhttp://www.billsautofab.com/images/6G72RWDconversionengineswapbellhousing4.jpg http://www.billsautofab.com/images/6G72RWDconversionengineswapbellhousing5.jpghttp://www.billsautofab.com/images/6G72RWDconversionengineswapbellhousing6.jpg http://www.billsautofab.com/images/6G72RWDconversionengineswapbellhousing8.jpg I weld a while, cut a while, machine out a while and just keep doing it, over and over againhttp://www.billsautofab.com/images/6G72RWDconversionengineswapbellhousing9(1).jpg http://www.billsautofab.com/images/6G72RWDconversionengineswapbellhousing10.jpg Edited August 18, 2011 by Bill Hincher Link to comment Share on other sites More sharing options...
slowquest Posted August 19, 2011 Report Share Posted August 19, 2011 Will the starter clear the floor pan? Link to comment Share on other sites More sharing options...
Bill Hincher Posted August 19, 2011 Report Share Posted August 19, 2011 Will the starter clear the floor pan? yeah, if the engine is located as the 4G63 is then the starter is forward of the firewall as well as low enough Link to comment Share on other sites More sharing options...
slowquest Posted August 20, 2011 Report Share Posted August 20, 2011 How far forward from stock would the engine/bellhousing face be? Link to comment Share on other sites More sharing options...
Bill Hincher Posted August 20, 2011 Report Share Posted August 20, 2011 I set the 4G63 about 2 inches ahead of where the G54b set, its where everything fit well and it didnt change anything in the engine compartentafter I get this housing done, I will build the mounts for it and set it in the conquest Link to comment Share on other sites More sharing options...
Bill Hincher Posted August 25, 2011 Report Share Posted August 25, 2011 I needed to fill in some panels just to keep the center's ridgedhttp://www.billsautofab.com/images/6G72adapterC4bellhousing.JPG http://www.billsautofab.com/images/6G72adapterC4bellhousing1.JPGhttp://www.billsautofab.com/images/6G72adapterC4bellhousing2.JPG http://www.billsautofab.com/images/6G72adapterC4bellhousing3.JPGhttp://www.billsautofab.com/images/6G72adapterC4bellhousing4.JPG http://www.billsautofab.com/images/6G72adapterC4bellhousing5.JPGhttp://www.billsautofab.com/images/6G72adapterC4bellhousing6.JPG http://www.billsautofab.com/images/6G72adapterC4bellhousing7.JPGhttp://www.billsautofab.com/images/6G72adapterC4bellhousing8.JPG http://www.billsautofab.com/images/6G72adapterC4bellhousing9.JPG Link to comment Share on other sites More sharing options...
Crazy larry Posted August 25, 2011 Report Share Posted August 25, 2011 what do you do in your spare time? lookin good Link to comment Share on other sites More sharing options...
Bill Hincher Posted August 31, 2011 Report Share Posted August 31, 2011 I just keep cutting, fitting ,welding and shaping the housinghttp://www.billsautofab.com/images/6G72adapterC4bellhousing10.JPG http://www.billsautofab.com/images/6G72adapterC4bellhousing11.JPGhttp://www.billsautofab.com/images/6G72adapterC4bellhousing12.JPG http://www.billsautofab.com/images/6G72adapterC4bellhousing13.JPGhttp://www.billsautofab.com/images/6G72adapterC4bellhousing14.JPG http://www.billsautofab.com/images/6G72adapterC4bellhousing15.JPGhttp://www.billsautofab.com/images/6G72adapterC4bellhousing16.JPG Link to comment Share on other sites More sharing options...
mb3000 Posted October 31, 2011 Report Share Posted October 31, 2011 Updates? Link to comment Share on other sites More sharing options...
slowquest Posted November 6, 2011 Report Share Posted November 6, 2011 Bill, will the starter still spin the motor over in the correct direction of rotation? Something about having it there is just bothering me....lol Link to comment Share on other sites More sharing options...
Recommended Posts