pc85 Posted March 22, 2012 Author Report Share Posted March 22, 2012 (edited) Back to the hareness tuck, much neater:http://i849.photobucket.com/albums/ab51/pc85dr/85%20Revived/IMG_1182-1.jpgTouched up and repainted the hareness strip.http://i849.photobucket.com/albums/ab51/pc85dr/85%20Revived/IMG_1184.jpgWith the fan mounted the right way? needed more spacing so new 2" spacer:http://i849.photobucket.com/albums/ab51/pc85dr/85%20Revived/IMG_1192-2.jpgFan remounted in right direction?http://i849.photobucket.com/albums/ab51/pc85dr/85%20Revived/IMG_1194-1.jpghttp://i849.photobucket.com/albums/ab51/pc85dr/85%20Revived/IMG_1193-1.jpgStill have my doubts about the fan, with the blades in that direction/pitch, I don't see how the air is going to be pushed into the radiator? looks like the air would get blown into the engine? Edited March 22, 2012 by pc85 Quote Link to comment Share on other sites More sharing options...
Killtodie Posted March 22, 2012 Report Share Posted March 22, 2012 yeah, that way the air gets pulled towards the engine. Unless a flex fan is supposed to do that. Quote Link to comment Share on other sites More sharing options...
Technology Posted March 22, 2012 Report Share Posted March 22, 2012 Uh, well the idea is to have air flow from the front of the car toward the back. The engine is hot, the air in front of the car isn't. Quote Link to comment Share on other sites More sharing options...
Killtodie Posted March 22, 2012 Report Share Posted March 22, 2012 Yes, but dont electric fans blow air towards the radiator, ie the front of the car? Quote Link to comment Share on other sites More sharing options...
Frenchi934 Posted March 22, 2012 Report Share Posted March 22, 2012 shouldnt it pull air away from the back of the radiator creating a low pressure zone that pulls air from the high pressure zone at the front of the car through the radiator to try to equalize pressure? Quote Link to comment Share on other sites More sharing options...
Killtodie Posted March 22, 2012 Report Share Posted March 22, 2012 (edited) Radiator fans are designed to blow air towards the radiator. Not sure about clutch or flex fans. *in some cars I guess. cant find a correct answer Edited March 22, 2012 by Killtodie Quote Link to comment Share on other sites More sharing options...
pc85 Posted March 23, 2012 Author Report Share Posted March 23, 2012 (edited) Radiator fans are designed to blow air towards the radiator. Not sure about clutch or flex fans. *in some cars I guess. cant find a correct answerThat's what I thought and that's why I mounted the fan the way I did. Now I'm starting to see things differently, when you're driving, there is high pressure of air in front of the vehicle as frenchi mentioned, flowing through the radiator. If the fan is blowing towards the radiator it would counter the flow of air coming in from the front of the vehicle. By moving air towards the engine, the fan actually creates a vacuum sucking more air through the radiator thus creating more airflow and cooling the engine bay at the same time. Edited March 23, 2012 by pc85 Quote Link to comment Share on other sites More sharing options...
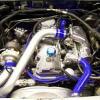
pc85 Posted March 23, 2012 Author Report Share Posted March 23, 2012 So here are some pics of the updates:Coolant reservoir moved to OEM location:http://i849.photobucket.com/albums/ab51/pc85dr/85%20Revived/IMG_1195.jpgPowersteering reservoir moved to front of turbo intake;http://i849.photobucket.com/albums/ab51/pc85dr/85%20Revived/IMG_1196.jpgand the mounted fan shroud:http://i849.photobucket.com/albums/ab51/pc85dr/85%20Revived/IMG_1197.jpgBTW, KTD Flexi-lite fans do have spacers available if you're interested in converting. My fan was shipped to maxboost87 for install so I never got the directions. Their website does have some information and mounting guidelines so I just found out after the fact that they have spacers available. Also the airflow is incredible !!! Quote Link to comment Share on other sites More sharing options...
Technology Posted March 23, 2012 Report Share Posted March 23, 2012 There are "puller" fans and "pusher" fans. You mount the pullers (all engine-mounted fans are pullers) on the engine-side of the radiator. You mount pusher fans on the front. You only use pusher fans if you don't have enough room. Notice how the stock A/C fan is on the front, but blows air front-to-back? Then the two on the back pull. Quote Link to comment Share on other sites More sharing options...
pc85 Posted March 23, 2012 Author Report Share Posted March 23, 2012 (edited) There are "puller" fans and "pusher" fans. You mount the pullers (all engine-mounted fans are pullers) on the engine-side of the radiator. You mount pusher fans on the front. You only use pusher fans if you don't have enough room. Notice how the stock A/C fan is on the front, but blows air front-to-back? Then the two on the back pull.There are also "standard"/clockwise and "reverse"/counterclockwise direction fans depending on how you want the air to flow but thanks for confirming what I said, the "standard"/puller fan helps move air through the radiator towards the engine like a vacuum. Edited March 23, 2012 by pc85 Quote Link to comment Share on other sites More sharing options...
Killtodie Posted March 23, 2012 Report Share Posted March 23, 2012 I have a flex fan and a guy to buy a shroud from, I'll get that installed soon. Quote Link to comment Share on other sites More sharing options...
pc85 Posted May 21, 2012 Author Report Share Posted May 21, 2012 Has been a busy spring, more home improvement projects slowing down the progress and ca$h flow but finally got some tires on those rims that were sitting in the garage for 2 months (that was killing me).Centerline custom billet wheels: 8 x 17 with 215-45-17 Continentals on the front, 9 x 17 with 245-40-17 Continentals on the rear. http://i849.photobucket.com/albums/ab51/pc85dr/85%20Revived/IMG_1221.jpghttp://i849.photobucket.com/albums/ab51/pc85dr/85%20Revived/IMG_1217.jpghttp://i849.photobucket.com/albums/ab51/pc85dr/85%20Revived/IMG_1216.jpgThe "to do" list got a little shorter, still have:1) custom interior console2) new stereo3) new paint job (may not be using Kona Blue after all?) With these rims, I'm thinking darker. Quote Link to comment Share on other sites More sharing options...
D_Venable Posted May 21, 2012 Report Share Posted May 21, 2012 looking good man Quote Link to comment Share on other sites More sharing options...
pc85 Posted May 21, 2012 Author Report Share Posted May 21, 2012 Thanks, finally on and I'm lovin them Quote Link to comment Share on other sites More sharing options...
pc85 Posted June 6, 2012 Author Report Share Posted June 6, 2012 Got some more parts this week, will be changing some maintenance stuff and installing Tokico coli overs soon!!! Quote Link to comment Share on other sites More sharing options...
pc85 Posted June 16, 2012 Author Report Share Posted June 16, 2012 (edited) It wasn't on the original to do list but AndyW made me an offer I couldn't refuse:Before, front KYB strut and Eibach spring:http://i849.photobucket.com/albums/ab51/pc85dr/85%20Revived/IMG_1230.jpgNew lower ball joint, old upper control arm:http://i849.photobucket.com/albums/ab51/pc85dr/85%20Revived/IMG_1235.jpgStrut assembly seated on upper control arm secured with lock nut/cotter pin and cap:http://i849.photobucket.com/albums/ab51/pc85dr/85%20Revived/IMG_1236.jpgHub and rotor assembly:http://i849.photobucket.com/albums/ab51/pc85dr/85%20Revived/IMG_1237.jpgAfter, final install with brake calipers re-mounted and adjustment plate set in the middle:http://i849.photobucket.com/albums/ab51/pc85dr/85%20Revived/IMG_1239.jpgWe weren't sure about what to do with the stock upper spring seat, it made sense to use it as a spacer to protect the insulator from the coil over spring plate so we kept it. What are you supposed to do with the spring seat? So much for the front, on to the rear struts.Before, rear KYB/Eibach spring:http://i849.photobucket.com/albums/ab51/pc85dr/85%20Revived/IMG_1243.jpgPull back side trunk panels:http://i849.photobucket.com/albums/ab51/pc85dr/85%20Revived/IMG_1240.jpgRemove cover cap to expose strut bolt and remove:http://i849.photobucket.com/albums/ab51/pc85dr/85%20Revived/IMG_1242.jpgLoosen the clamp on the axle housing and the mounting bracket on the strut assembly:http://i849.photobucket.com/albums/ab51/pc85dr/85%20Revived/IMG_1244.jpgThen start banging away and good luck freeing the strut from the axle housing:http://i849.photobucket.com/albums/ab51/pc85dr/85%20Revived/IMG_1245.jpgAnd if your lucky, you can get the strut insert to line up and fit back in:http://i849.photobucket.com/albums/ab51/pc85dr/85%20Revived/IMG_1247.jpgDid the same thing with the rear struts and the upper spring seats. If I do get the car repainted next year, I'll be taking down all the struts, possibly powder coating the strut assemblies as well as any other stock parts that need refinishing so I can take care of the spring seats then.Surprisingly, with the coil overs down to the max, the stance is almost exactly the same as with my KYB's/Eibach set up? Edited June 16, 2012 by pc85 Quote Link to comment Share on other sites More sharing options...
D_Venable Posted June 16, 2012 Report Share Posted June 16, 2012 Surprisingly, with the coil overs down to the max, the stance is almost exactly the same as with my KYB's/Eibach set up? That's because your reusing the stock upper spring perch. essentially, your running 2 upper perches, and the stock perch is adding height to the setup where it steps down. But you can't just pull them out and put everything back together. You need to run 2 5/8" grade 8 washers in their place at each corner. This will take up the height on the shaft where the stock perch is keyed into. Running the washers keeps the threads on the struts from bottoming out before you actually have it tight on the isolators. Quote Link to comment Share on other sites More sharing options...
pc85 Posted June 16, 2012 Author Report Share Posted June 16, 2012 (edited) Yeah, after having them mounted, I figured the spring perches were too high but that's how I got them from AndyW. Eventually I'll have to have them cut down and re welded. I actually can't lower the car anymore right now or I'll have rubbing issues. I'll see about getting the fenders rolled when I get her painted and deal with it then. Regarding the washers, isn't the upper spring seat doing the same thing, essentially serving as the 2 washers? Edited June 16, 2012 by pc85 Quote Link to comment Share on other sites More sharing options...
D_Venable Posted June 16, 2012 Report Share Posted June 16, 2012 the lower perch Andy welded on the strut is fine. Yes the upper perch/spring seat is doing the same thing as the washers, BUT the spring seat drops down quite a bit around the middle, thus pushing the aluminum spring seat/perch/tophat that is above the coilover spring further down, and the reason your at the bottom of your height adjustment. Replace that upper spring seat/perch/tophat with the washers gets rid of that extra height, and gives you the freedom to go lower. Here's a pic of how my setup use to look on my 88, Notice how close that upper spring seat/tophat is to the isolator, it's not touching it, and has those 2 5/8" washers to replace the stock piece. http://www.26liter.us/gallery/albums/userpics/10030/DSCF5629.jpg OH, and how's your front camber? Wasn't Andy's setup from a widebody? or did he redo the perch on some flatty casings for you? Quote Link to comment Share on other sites More sharing options...
SFBMX88 Posted June 16, 2012 Report Share Posted June 16, 2012 If you end up installing some camber plates, you can use some thrust bearings and races to smooth out the steering operation. http://i.imgur.com/s3rmI.jpghttp://i.imgur.com/zRfBn.jpg Quote Link to comment Share on other sites More sharing options...
pc85 Posted June 17, 2012 Author Report Share Posted June 17, 2012 the lower perch Andy welded on the strut is fine. Yes the upper perch/spring seat is doing the same thing as the washers, BUT the spring seat drops down quite a bit around the middle, thus pushing the aluminum spring seat/perch/tophat that is above the coilover spring further down, and the reason your at the bottom of your height adjustment. Replace that upper spring seat/perch/tophat with the washers gets rid of that extra height, and gives you the freedom to go lower. Here's a pic of how my setup use to look on my 88, Notice how close that upper spring seat/tophat is to the isolator, it's not touching it, and has those 2 5/8" washers to replace the stock piece. http://www.26liter.us/gallery/albums/userpics/10030/DSCF5629.jpg OH, and how's your front camber? Wasn't Andy's setup from a widebody? or did he redo the perch on some flatty casings for you?Got it, with out the top spring seat it would probably drop at least 1/2 inch.Camber is fine, he did changed to a flatty housing. But on that note, I had the car aligned after putting in the struts and the guy had trouble with the right front tire because the passenger's side tie rod has no adjustment, is this normal?. Quote Link to comment Share on other sites More sharing options...
SFBMX88 Posted June 17, 2012 Report Share Posted June 17, 2012 Mitsubishi says to position(not adjust) the passenger side wheel until it is within spec on the alignment machine, then adjust the driver side tie rod off of that. This may require you to remove and reposition your steering wheel after adjusting to make everything straight. If the passenger side tie rod is way out of spec, then to adjust it, it has to be separated from the steering arm. If only Mitsubishi used a rack and pinion system...... Quote Link to comment Share on other sites More sharing options...
pc85 Posted July 24, 2012 Author Report Share Posted July 24, 2012 I'm getting soo tired of this piece of shipotle. The more I spend on this hunk of metal junk the more frustrated I get !!! Been on this ride for 4 years, starting to regret I ever got started. Have some wiring/tuning issues, can't use my turn signals or the whole car bucks and hesitates, it stalls every time I take my foot off the pedal, in the winter it wouldn't even start. If I can't get this thing tuned soon and enjoy some of the fruits of my $$$ labor, its going to get sold of parted.I just needed to vent, this really sucks. Quote Link to comment Share on other sites More sharing options...
ZacMan Posted July 24, 2012 Report Share Posted July 24, 2012 Definately sounds like you've got a wiring issue going on there, or some major voltage stabilisation issues.. What's the power supply to your ECU like? I reckon street tuning is only ever good for getting a car to a dyno for it to be done properly. Unfortunately that makes it expensive, but it'll drive a million times better afterwards! Don't give up, I love your car. Flatty Love Quote Link to comment Share on other sites More sharing options...
pc85 Posted July 24, 2012 Author Report Share Posted July 24, 2012 I went with a Haltech Sprint 500 ECU and a Haltech 2 channel ignition for compatibility instead of an MSD. Anyway, I just talked to the tuner who sold me the Haltech and I'll be taking it down next month hopefully. Since I can't do this kind of work, its costing me an arm a leg plus the time OMG, this is getting old but thanks for the encouragement. Quote Link to comment Share on other sites More sharing options...
Recommended Posts
Join the conversation
You can post now and register later. If you have an account, sign in now to post with your account.