QuestFan Posted October 5, 2011 Author Report Share Posted October 5, 2011 http://img52.imageshack.us/img52/7650/img1767m.jpg http://img716.imageshack.us/img716/6333/img1768g.jpg http://img687.imageshack.us/img687/7532/img1771tla.jpg http://img593.imageshack.us/img593/1578/img1770x.jpg http://img51.imageshack.us/img51/6885/img1769p.jpg Link to comment Share on other sites More sharing options...
QuestFan Posted October 5, 2011 Author Report Share Posted October 5, 2011 (edited) Some crappy pictures of my intake. http://img717.imageshack.us/img717/9821/img1772em.jpg http://img267.imageshack.us/img267/1122/img1773p.jpg http://img687.imageshack.us/img687/3812/img1774it.jpg http://img189.imageshack.us/img189/867/img1775az.jpg http://img52.imageshack.us/img52/7559/img1776rd.jpg http://img607.imageshack.us/img607/4858/img1777k.jpg http://img5.imageshack.us/img5/7840/img1778ml.jpg Edited October 5, 2011 by QuestFan Link to comment Share on other sites More sharing options...
QuestFan Posted October 5, 2011 Author Report Share Posted October 5, 2011 (edited) Pictures of the work space and such. This is how we do it down in Elm Mott Texas. A Bronco on one side of the shop getting a lift kit installed, a 71 El Camino on the other side getting restored, and a Conquest outside getting some TLC. http://img847.imageshack.us/img847/6757/img1780m.jpg http://img403.imageshack.us/img403/8/img1781ck.jpg The portable tunes producer I made. Old Kenwood head unit tuned to the local rock station playing out of some old Jensen marine speakers.http://img812.imageshack.us/img812/4319/img1782u.jpg http://img571.imageshack.us/img571/4593/img1783vv.jpg Pipes all loose and hanging. lol First time I have EVER posted a picture of the right front corner where you can see the only major body damage. The rest is hail and door dings.http://img805.imageshack.us/img805/3595/img1784r.jpg Edited October 5, 2011 by QuestFan Link to comment Share on other sites More sharing options...
QuestFan Posted October 5, 2011 Author Report Share Posted October 5, 2011 Sorry for the low quality pictures. I use my iPhone3Gs while I work to take pictures. Getting ready to drop the oil pan so I can have the AN fitting welded in. Link to comment Share on other sites More sharing options...
Komeuppance Posted October 5, 2011 Report Share Posted October 5, 2011 Haha, I got your PM, I see you searched and found an old thread of mine... for that I will reward your efforts with information: The stock thread size for the oil feed line on the adapter plate is 1/4" BPST... but it's impossible to find a BPST to AN fitting. I'm sure what most oil line suppliers provide is a 1/4" NPT, unless they have a magical place that I could not find that supplies a BPST to AN. You're best off buying a 1/4" NPT tap while you've got the engine off and then picking up one of these:http://www.summitrac...ts/AER-FBM5002/ 1/4" NPT to -4AN fitting. (-4AN is the common feed line sold for stock SQ's by various vendors) -Robert Link to comment Share on other sites More sharing options...
QuestFan Posted October 5, 2011 Author Report Share Posted October 5, 2011 Thank you sir. I already did exactly that. Actually I had the right fitting and the tap sitting right in front of me, just had to dig for them. Luckily my grandma didnt give away all of grandpa's tools and goodies when he passed away. Link to comment Share on other sites More sharing options...
QuestFan Posted October 5, 2011 Author Report Share Posted October 5, 2011 Oil pan is off. Now I am off to get the fitting welded in. Link to comment Share on other sites More sharing options...
QuestFan Posted October 6, 2011 Author Report Share Posted October 6, 2011 (edited) Oil Pan Removal http://img689.imageshack.us/img689/8001/img1785nx.jpg http://img41.imageshack.us/img41/1236/img1786gh.jpg http://img710.imageshack.us/img710/145/img1787s.jpg http://img204.imageshack.us/img204/8479/img1788rc.jpg P.O. said he replaced all the front end bushings. Guess he didnt car to replace the sway bar bushings. I will replace them with a universal kit from energy suspension. 7/8" dia bar correct?? http://shop.advanceautoparts.com/webapp/wcs/stores/servlet/product_Polyurethane-Sway-Bar-Bushings;-for-7-8%22-Dia--Bar;-2-Bushings-and-Brackets---Red-Energy-Suspension_17360822-P_N3435C_P%7CGRP60035_____ http://img713.imageshack.us/img713/4020/img1789ro.jpg http://img12.imageshack.us/img12/9493/img1790wb.jpg Edited October 6, 2011 by QuestFan Link to comment Share on other sites More sharing options...
averse Posted October 6, 2011 Report Share Posted October 6, 2011 (edited) I got some energy suspension ones and ended up buying stock replacements at Autozone for 5 bucks instead. If someone knows exactly which part # for the energy suspension ones to replace stock please offer them up, because they have 4 pages of part numbers in different sizes. You have to consider the bar size (21 mm as I recall), the clearance or height of the bushing, the width of the bracket holes to match up to our thread position, etc... Energy Suspension doesnt have a database handy to match their bushings part numbers to stock model vehicles, which would be handy. EDIT: found link to their various sizes of bushings, greasable and non-greasable: http://www.energysuspensionparts.com/Universal-Sway-Bar-Bushings.asp Edited October 6, 2011 by averse Link to comment Share on other sites More sharing options...
SOTTY Posted October 6, 2011 Report Share Posted October 6, 2011 I ripped thru Elm mott , Texas not so long ago on one of my cross country SQ blasts . Link to comment Share on other sites More sharing options...
QuestFan Posted October 6, 2011 Author Report Share Posted October 6, 2011 (edited) I ripped thru Elm mott , Texas not so long ago on one of my cross country SQ blasts . Only Quest I've seen come through these parts is a white one with two different pairs of wheels on it. But the street I live on is about a mile long dead end and I live at the very end of it so I dont see or hear much. Still dont know who this was:http://img51.imageshack.us/img51/695/questinelmmott.jpg Edited October 6, 2011 by QuestFan Link to comment Share on other sites More sharing options...
QuestFan Posted October 6, 2011 Author Report Share Posted October 6, 2011 (edited) I got some energy suspension ones and ended up buying stock replacements at Autozone for 5 bucks instead. If someone knows exactly which part # for the energy suspension ones to replace stock please offer them up, because they have 4 pages of part numbers in different sizes. You have to consider the bar size (21 mm as I recall), the clearance or height of the bushing, the width of the bracket holes to match up to our thread position, etc... Energy Suspension doesnt have a database handy to match their bushings part numbers to stock model vehicles, which would be handy. EDIT: found link to their various sizes of bushings, greasable and non-greasable: http://www.energysus...ar-Bushings.asp You can get universal bushings in different sizes and the mounting holes in the universals are slotted so it gives you plenty of play room. As for the height, I dont really see how that would effect anything. If anything it wont be off by no more than a cm. Edited October 6, 2011 by QuestFan Link to comment Share on other sites More sharing options...
averse Posted October 6, 2011 Report Share Posted October 6, 2011 The set I bought were not high enough and I would have had to make up some sort of spacers. They were pushing the bar too high up into the frame of the car and the tabs were still not flush against the bolt holes, if that makes sense. The ES bushings are much thicker than stock, which means more space between the top (bottom when installed) part of the bushing bracket and the sway bar itself. I'm still fairly amateur at this car stuff, so if you get a set to work without needing to grind on the bushing or fab up a custom connecter PLEASE share, because I would buy a plug and play set in a heartbeat. Link to comment Share on other sites More sharing options...
Technology Posted October 6, 2011 Report Share Posted October 6, 2011 I like how you changed the name of the thread, haha! Link to comment Share on other sites More sharing options...
QuestFan Posted October 6, 2011 Author Report Share Posted October 6, 2011 I like how you changed the name of the thread, haha! Haha I figured it was more appropriate. Link to comment Share on other sites More sharing options...
QuestFan Posted October 6, 2011 Author Report Share Posted October 6, 2011 Boredom got the best of me and I sprayed the engine bay down with some degreaser and cleaned a bunch of stuff. Then I tried this new wax my dad got out on the engine bay. Made it look pretty good under there. Note the shiny red paint in pictures above. Then I pulled the oil cooler and lines and flushed it all out. Link to comment Share on other sites More sharing options...
QuestFan Posted October 6, 2011 Author Report Share Posted October 6, 2011 I now realize that was a bad order to do things. Lol I hope it don't rain because my car is sitting outside with no oil pan. I tried to wrap it up with press n seal wrap. Lol Link to comment Share on other sites More sharing options...
Technology Posted October 7, 2011 Report Share Posted October 7, 2011 there's oil all up in there, it won't be a problem. plastic bags, tarps, etc. Link to comment Share on other sites More sharing options...
QuestFan Posted October 7, 2011 Author Report Share Posted October 7, 2011 Three more items added up top! Time to go put the turbo back on! Link to comment Share on other sites More sharing options...
QuestFan Posted October 8, 2011 Author Report Share Posted October 8, 2011 Turbo is back on. Still waiting on my fitting to get welded to the oil pan and then its to the exhaust pipe. Link to comment Share on other sites More sharing options...
Technology Posted October 8, 2011 Report Share Posted October 8, 2011 pictures! Link to comment Share on other sites More sharing options...
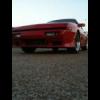
Indiana Posted October 8, 2011 Report Share Posted October 8, 2011 I'm not saying this won't work but I just wanted to mention something before you get all finished and have to deal with this after the fact. Your intercooler appears to block most of the air that goes up behind the bumper support and into the radiator. When I put a panel on top of an intercooler that was much further back to force the air into the intercooler, the coolant temps went up quite a bit. I removed the panel and they went back down. http://img593.imageshack.us/img593/1578/img1770x.jpg http://img51.imageshack.us/img51/6885/img1769p.jpg Link to comment Share on other sites More sharing options...
QuestFan Posted October 8, 2011 Author Report Share Posted October 8, 2011 I'm not saying this won't work but I just wanted to mention something before you get all finished and have to deal with this after the fact. Your intercooler appears to block most of the air that goes up behind the bumper support and into the radiator. When I put a panel on top of an intercooler that was much further back to force the air into the intercooler, the coolant temps went up quite a bit. I removed the panel and they went back down. This could explain my high cooling temps. Seems like ever since I went MPI it ran a bit warmer, That intercooler has been in that same spot since I did MPI. I just had it hanging from the bottom of the oil cooler. Hmm. So should I angle the intercooler? I cant really move it any farther down. Link to comment Share on other sites More sharing options...
Technology Posted October 8, 2011 Report Share Posted October 8, 2011 I cut my bumper support to accommodate my intercooler, apparently it was a good idea. Car has never run too hot. Link to comment Share on other sites More sharing options...
QuestFan Posted October 8, 2011 Author Report Share Posted October 8, 2011 (edited) More Pictures! Ugh, this doesnt look good. That is the only place I can see that the blade contacted the housing, both front and rear.http://img843.imageshack.us/img843/6151/img1793p.jpg http://img694.imageshack.us/img694/5743/img1795p.jpg http://img708.imageshack.us/img708/2512/img1796n.jpg http://img405.imageshack.us/img405/241/img1797oo.jpg These next few pictures show why I can't clock the turbo any farther. I guess I will have to wrap the header right there so the heat doesnt effect the line too much. I am going to get a 90 or 45 degree elbow to replace that straight fitting coming out of the turbo. Unless the fitting hits on the housing causing it not to thread into the hole. That fitting felt like it was in there pretty good when I attempted to remove it... So hopefully all goes well there. But I think I am SOL there... Any ideas guys?http://img839.imageshack.us/img839/7108/img1798rt.jpg http://img545.imageshack.us/img545/4590/img1800c.jpg http://img841.imageshack.us/img841/3918/img1801gs.jpg http://img694.imageshack.us/img694/8122/img1802d.jpg I found this little guy hanging from my fuel line.http://img706.imageshack.us/img706/7320/img1803g.jpg Edited October 8, 2011 by QuestFan Link to comment Share on other sites More sharing options...
Recommended Posts