Leaderboard


Popular Content
Showing content with the highest reputation on 12/29/11 in all areas
-
Here it is guys, a solution to the flaky buttons on the 87 and older HVAC controller faceplate. I make these at my place of work and designed it exclusively for you all (I have an 88 so it doesn't work for mine). What this is exactly is a printed and die-cut self adhesive overlay kit. If you're tired of looking at the 5 flaky silver buttons or the famous shiny spots on the up and down buttons this is for you. I applied it to a junkyard unit that I grabbed and it looks so much better. So if you'd like yours to look like this one then grab one today. With this kit you'll receive*: 5 - brushed silver, self adhesive button overlays for: Fresh & Recirculated Air Economy Defrost Auto Off 1 - Clear film with printed black and orange, which is also self adhesive (Temp Display/Up & Down/Face & Foot and High and Low Fan Speed Controls) http://i1234.photobucket.com/albums/ff408/n8tallica1/SQC%20Items/P1000480.jpg http://i1234.photobucket.com/albums/ff408/n8tallica1/SQC%20Items/P1000477.jpg Pricing for this item is $25.00 shipped anywhere in the U.S My paypal address is: natallica@comcast.net DIsclaimer I assume NO responsibility in ANY damage done to your faceplate if you choose to purchase one of these kits for yours, I am only offering these (and this walk-through) as an inexpensive cosmetic replacement to old worn out buttons. Apart from finding a brand new unit (which is impossible) this is the only option that I can think of, so if you think you are mechanically inclined enough to dismantle and scrape glue and metal and clean surfaces...then by all means grab one of these kits. It's relatively easy to do if you take your time and be thorough in the prep, you should be happy with the results. *Faceplate in photo not included Thanks Guys, lemme know what you think! -N81 point
-
I have an 88 Mitsubishi Starion (aka Chrysler Conquest) parts car sitting in my driveway that I want gone. Nearly a complete car. I will sell parts or the whole thing. There is a complete interior four 8" rear wheels with polished lips and black centers $350 5-speed that grinds 4th $100 ecu $80 torque tube $40 rear diff $200 drive shaft $50 tail lights $100 fog lights $50 door windows $50 each power door mirrors $80 seat belt motors $50 each Some engine parts. No motor or trans in car. The body of the car is rusty as hell and I am slowly removing parts to sell or use on my other Starion and going tho scrap the shell, but if you want the shell it yours. Pics upon request just let me know what you want. ALL PROCESS NEGOTIABLE!1 point
-
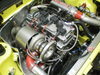
Just an update. I spent pretty much all last night, about 5 hours or so, shrink wrapping and protecting all my wires real good. In the process of doing that. I went with my gut that the extra A6 +5V power lead from the ecu that I had could be hooked up to the dizzy for the 5V power source it needed. Instead of using a 12V source and resistor to pull the voltage down. Works real nice this way, and cleaner too. Engine bay is real neat, with no wires poking out. I'll take some pics tomorrow, well later this morning anyhow. I'm real excited about this. Haven't been able to drive my car for about 8yrs. Just need to tame the fuel delivery down a bit and it will be ready to go.1 point
-
Have you ever considered adding another cylinder? V9s are all the rage.1 point
-
The following is a how to on a rear axle rebuild: You will need to start by pulling the axle housing from the car. First jack up the car, pull the tire, caliper, rotor, small retainer bolt under the rotor on the bottom of the axle housing and 2 top bolts that hold the strut to the axle housing. Drive a small wedge into the strut housing seam to open it up enough to allow the axle housing to drop once the main retainer bolt is expelled. The following are some tips on extracting the main axle housing bolt. They can be a little tough to remove. 1) Get some PB blaster and hose all of the sections of the bolt that you have access to. 2) Make sure you have the small bolt out of the bottom, it's a 12mm on both ends. 3) Get an impact gun if you can borrow one, it will make it way easier to get the large bolt out. 4) Drive the nut off, use a breaker bar to break it loose. 5) Compress the spring. If you don't all of the pressure that is pushing down on the axle housing shaft will make it more difficult to remove. 6) If you don't have a spring compressor put a jack under the rear A-arm and lift it until the tire is coming off the ground, then get a snap strap, wrap it around the top and bottom of the spring itself and crank on the handle to get the strap as tight as possible. Then put the jack under the rear diff and lift it off the ground, that will take the weight off the lower A-arm. 7) Get a friend to help you. 8) Get a nylon hammer, and gently smack the end of the bolt WHILE spinning the bolt in reverse with the impact gun. 9) Once you get it started, take a pry bar and pry against the big washer again WHILE spinning the bolt in reverse with the impact gun. 10) Continue until it's out, keep dousing with PB as you go. When you can get any leverage anymore because the bolt is starting to work it's way out, put a 2x4 in between the pry bar and the lower caliper mounting bracket and keep going. Continue till it's out. 11) If you have to smack the bolt itself, put the nut on and drive it down to the top of the bolt. That way you won't damage the threads. There is no majic, lots of blood, sweat and tears. I did it myself today, would have been much faster with a helper.1 point
-
Likely reason is Ignitors get hot and isnt enof cooling for it is my guess. Why their are no TSB well its a old car so they dont really care about it any more... and havent for a while. Electronics that get very hot can only do that so many cycles they dont last forever. I read all your post and dont really see any resanable explination for why they wont brake, just that why they are not prone(in the past) for braking. I know your experiences are more important then everyone elses, so what can i say other then your right. For YOUR car it is reliable. But giving the problems i have seen in my 14yrs of owning these cars and being at lest somewhat active on forms and helping other people out, its pretty clear that the smaller plastic ignitors fail much more often then the other ones(actually i dont remember any of the larger ones failing). I am not saying i know everything. I know enough to know I dont not very much lol.1 point
-
It's cool that Cal's ignitor is still going strong. Testament that they CAN last, but as the the odds go they tend to fail, and in the SQ game, given the fact that most of us don't know every bit of history about the cars we buy, the best we can do is be prepared. The box in my 87 died several years ago, long before I found this site. I had no idea what to look for as being the culprit so on a whim I swapped the box from my 86 parts car. It worked, and outlasted the rest of the car. Knowing what I know now, if I happened into a pre-88 I'd opt to change out the ignitor as one of my early mods. You can always buy a spare plastic box, but given that they're prone to failure, how long will it last, or will it even fire the car if you need it? Best to upgrade and close that chapter.1 point
-
Ya you guys do it big in Texas. In reality, I'd love to race in the east coast where they have that magical air.1 point