Leaderboard


Popular Content
Showing content with the highest reputation since 09/20/11 in Posts
-
Hi, I see that most of you that responded to my Warning Points post think that I give good information in trying to help you out, but disagree with the way I come off in answering posts sometimes. O.K. I will try and be more compassionate when responding to posts as I hope others will be towards me. Thanks, Bill9 points
-
http://i.imgur.com/ugqEBQl.jpg http://i.imgur.com/KFXH3NF.jpg I think they're cool. Can't wait to see them on the car!8 points
-
me eather 23 like'd out of 37k posts waste of space7 points
-
So this is a project 13 years in the waiting ... but I finally took to it this past week. At purchase, my car had a perfect rear cargo cover, which I was excited about b/c in all the other Quest sI had owned they were damaged. It was short-lived, b/c one month later a tree fell on my car, crushing the roof, hatch, ... and busting up my rear cargo cover. Well, that was 13 years ago already, so here's how I finally rebuilt it: Obviously remove the cover. You can see where the branches of the tree punctured the cover. I'm only repairing the lower section, but these steps could apply to rebuilding the whole thing if you needed to replace the fiberboard on the top section too. I started by peeling back the carpet on the left and right sides. Next, I flipped the cover over and peeled the carpet back. Oh look, all these years later still finding glass from the tree incident .... lol. Next, you'll need to drill out the rivets on the black hinge with a 3/16" bit. Once all the rivets are drilled out you'll have the hinge free. It still won't be free just yet though. Flip the cover back over and you'll find there's a material strip stapled to the cover. Grab your needle nose and pull the staples. Then the fiberboard material will finally be free. I had a scrap piece of 1/8 inch masonite laying around from a home project. It was just big enough to use a replacement piece. I simply used a sharpie and traced the outline on the masonite. These piece had some spray paint on it from other project, but I didn't care b/c I was going to be painting it black anyway. Next, use the hinge and mark the holes for the rivets. Not shown, but next I drill the holes and cut it out the shape on a bandsaw. I used some sandpaper on the edges quick just to smooth it over, but I didn't go crazy b/c there's no exposed edges of material, it's all covered by carpet. Now I threw some paint on. I quickly realized the black on the underside of the top section was not going to match anymore, so I tossed a coat of fresh black on the underside of that too so it all looked uniform. Now it's time to go back the other way. To reattach the carpet I purchased some Gorilla spray adhesive. I've also used 3M Super 77 for projects like this, and that works really well too, FYI. Don't start spraying things just yet though .... BEFORE you spray adhesive the carpet and put the board back on, you need to put screws through the holes you drilled b/c you won't be able to access them once it's adhered to the carpet. I just used simple machine screws to replace the rivets. Flip it over carefully so your screws don't fall out. Once you do that, spray the board and the back of the carpet and let it dry for a few seconds before putting it down. I quickly dropped on washers and loosely threaded nuts on the screws. Once the carpet is adhered well you can flip it upside down again and roll the remaining edges over. Spray everything down with adhesive and it'll stick nice. Lastly, re-attach the rubber gasket on the rear edge. It just presses on. Here it is re-installed in the car. Much better. Good luck. It's a pretty easy little project. You can do it.6 points
-
6 points
-
You should make an SQ one that smells like broken dreams.6 points
-
go to bed.... check wake up december 22..... check go about normal life..... check laugh at the dumb people who panicked.... check yeah, i can predict the future, thats what im doing6 points
-
Breaking news Mitsubishi will be trying to reboot their brand by bringing back the starion and 3000gt as a pickup and minivan, respectively5 points
-
So as most of you know I've been killing myself to get my car ready for the race last weekend ( Ultimate Street Car Association/ Optima Batteries Qualifier @ Auto Club Speedway in Fontana) Long story short the hard work payed in full. The car was extremely competitive the whole weekend winning most events in all classes, let alone the gt2k (under 3k lbs class) The wider track, better tires and overall look of the car took it home. I beat the living hell out of it like always and it took it in strides. Couldn't be happier with her. Finally I got my ticket back to SEMA for another shot at the title of the Ultimate Street Car. Took first in all events except for the auto x by .3 secs to a nascar framed pickup (No Limit Racing C10) MONSTER haha There are 6 qualifier events left throughout the country, I GUARANTY you will have the most fun you've ever had in your car. Visit www.ultimatestreetcarassociation.com for the list. SIGN UP! On to pics. Video soon, got some editing to do. Thank you to all who have posted in the "going wider" thread, you guys really keep me motivated to continue pushing. I received TONS of coverage, TV, websites and prolly a few magazines in the process. The value of our cars is on the rise! http://i177.photobucket.com/albums/w239/johnboy9788/DSC_3397_zpsbb1f43fd.jpg http://i177.photobucket.com/albums/w239/johnboy9788/DSC_3420_zpsc3eab0d4.jpg http://i177.photobucket.com/albums/w239/johnboy9788/DSC_3432_zps02ba9ada.jpg http://i177.photobucket.com/albums/w239/johnboy9788/DSC_3447_zpse81c4053.jpg http://i177.photobucket.com/albums/w239/johnboy9788/DSC_3488_zps97d9afd6.jpg http://i177.photobucket.com/albums/w239/johnboy9788/DSC_3440_zpsc0b1fb67.jpg http://i177.photobucket.com/albums/w239/johnboy9788/DSC_3459_zps3f828a21.jpg http://i177.photobucket.com/albums/w239/johnboy9788/DSC_3527_zps26a3e741.jpg5 points
-
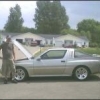
I always got projects going on .. winter and every other season in between ... 😁 Some of you who have been around for a while will remember StarquestJoe, I purchased a Galant VR4 he had sitting in his backyard after a few years of asking him about it. My son was 10 at the time, and my thought was if we started restoration on it we could maybe be done by the time he was 16. So we have been working on that for the past 3 years. So far, most of the work has been just building the motor. We had to tear everything down, send it all out to be machined and cleaned and then put everything back together. In the meantime, the car has been in storage at my father-in-laws shop. At this point the motor is pretty much finished ready to go, so it's time to bring the physical car home and start working that. I want to go over the brakes, suspension and drop the gas tank and see what's going on there. That will be our winter project. To get started though I have to find a storage place to keep my Eclipse. I have a few leads on some garages, but it's been tough between work and weather to get the car dropped off and in storage. I have a 3 car garage, but I need to get rid of one car in order to bring his home and begin work on it. I hate to send the Starion out of my sight since I have so much into it, so Eclipse is the winter storage candidate. I've never stored a car before, and I'm finding it out it's not cheap. I have a fully detailed thread going on on DSM Tuners of the VR4 resto you can click through when you're bored here: Galant VR4 Restoration Here's a few pics though just to give you the idea. Thus far, I've enjoyed this project more than any other I've done in the last 25 years. Teaching my son and watching become passionate about the hobby and have his ideas and dreams has been really cool. This is what we started with. Supposedly Joe got this 4G63 from StarquestRescue, another name many of you will remember well. This a picture of the car the day after we picked it up and brought it back to the shop. The car itself has been and had been sitting for a while, so if it doesn't work out we can always buy a 1G, 2G or even another VR4 and drop our engine in. So we have options. It been a long road so far and the Eclipse and Station don't get as much attention right now, but this hopefully will worth it in the end.4 points
-
"TURBO" Door handles are tough to find, and they are tougher to find in decent shape. If you like the look, and want the look, here's a cheap and easy way to create it. First, start by removing your door handles. I won't go over how to do that here, but there are posts you can find. I'll try to link one up later. Next, you'll need a set of the "TURBO" stickers. They are available on eBay, or, you can have your own made. I had a graphic artist friend make these for me. I think the ones on eBay are about $5. If you've ever seen a "real" set of turbo handles, they are perfectly smooth. Conversely, the "standard" handles are textured. They have what I call a knurling on them. You need to carefully sand that off smooth. I used my palm sander and rotated through 150, 220 and some 400 by hand. When you're done, it should look like this. Once you are this far the "black" on the handles will be kinda dull and flat looking. We need to bring that back to a shine to have a look correct. For this I grabbed some buffing compound and a buffing wheel. After some polishing you should be able to get the handles to look like this. Now we can sticker them up. Do some measuring and get everything centered up. Peel back the covering ... and ... ta-da! $5 TURBO door handles. Last thing I did to these that I didn't show was a took a can of clear spray paint and just gave them a light coating a day later to help prevent the stickers from peeling up.4 points
-
I sent Ryddler a message and asked him to update the home screen. Jimmy4 points
-
I'm actually restoring a Galant VR4 right now with my son. We're about 2 years in.4 points
-
At the end of the last driving season, I noticed my antenna wasn't retracting all the way, so I figured it's time to dig in and see if we can fix this thing. First, you'll need to remove a few carpet panels in the rear trunk area. Once they are out of your way, you need to remove two nuts. The second one is under the rear deck support sheet metal. To get it out, you'll have to drop it down into the rear fender and snake the antenna part out first, It's a little tricky, but with some finagling you'll be able to sneak it out. Don't forget to remove the ground screw just below the upper nut too. Once you get it on your bench you can pop the on side off and you'll see all the gearing. On the other half you'll see the electrical connections. You can see there are contacts that ride on the metal surface as the gears spin. Clean up and re-lube the electrical side up with dielectric grease. That's all you need to do to that side. While you're at it, grab some White Lithium Grease too. If you don't have any make a trip to your local Auto Store. Give all the plastic gear a good cleaning, get all the dried up gunk off and re-coat everything with the White Lithium Grease. Next, flip the whole unit over and we'll move over to the mast. There is a plastic housing that has the retract tape inside. It's coiled in there like a snake in a can. Pop it off and will sorta burst out. Mine was nasty. It takes some time, but clean the tape entirely. I used Simple Green. Then re-lube the whole tape with a generous amount of White Lithium Grease. It's a bit tricky, but recoil it into the housing and put everything back together. Then reinstall in your car. Hold your breathe and give it shot. Here's a video link to mine working again! Starquest Rear Antenna Video4 points
-
Just a few months ago I created a YouTube video on how to rebuild your rear brakes and the e-brake mechanism. I posted a link to the video on the club, but I forget where I posted it. Either the BS section or the VR. I'll see if I can find the link for you. Also you can still buy brake rebuild kits at Rock Auto. They only cost a few bucks.4 points
-
It's been 2 years since we closed our shop. Many people continued to ask me about parts so Diane and I started Dads Engine Parts LLC we went online today. link below. Dad Dads Engine Parts Llc.4 points
-
What does ruing mean? Oh it must be the word used for making something faster more reliable and far better than your car .... Yeah that sounds right.4 points
-
I just like talking crap. Except for BOHO. Im 100% serious about the things I will do to his mouth! Most engines can suprise. Thats maybe what I like about the out dated, under powered, unsupported G54B. I was at a shop a day ago inquiring about using their dyno and when he asked what I had, I said, "just a crappy 4 banger" he laughed and said, "cant be that bad" he asked more and when I told him what it made and what it runs he laughed and said, thats better than 90% of the cars I see. talked about SRT-4's, Mustangs, Supras, 240's and other V8's. Then I told him it was a single stick 8 valve head and he laughed in amazement. All well built cars are cool as long as they are DIFFERENT.4 points
-
I would have liked this twice if I could have.4 points
-
I told my wife to put my ashes in the trunk of the car, that way if she gets stuck in the snow she can use it for traction. Dad4 points
-
Stupid kids holding their iphone verticle to record video. I bet the hold their guns sideways too.4 points
-
damn you and all your space... to park stuff...or sit..or run around..or do whatthe*********ever you want. damn you!4 points
-
No one ever calls me. http://i1.kym-cdn.com/entries/icons/original/000/003/619/Untitled-1.jpg4 points
-
great, so even a chrysler engineer couldn't get it to run and gave up.4 points
-
Johnny Wadd has a post from 2013 in this section on how to do this, but like so many other threads, all the pics are missing, so here's my recreation of this process: You can remove the console latch with the center console still installed in the car. You do NOT have to remove it the whole console unless you want to for some reason. For this tutorial, this console was already removed. First, remove the flocked bin/cubby inside your console by prying up on it. It'll pop out. Next, remove the two hinge bolts that hold the lid. The lid will be removable at this point. Now remove the 4 larger screws you see. Under the map lid you will find 5 smaller screws. Remove all five. Remove the hard plastic piece and you'll have access to the latch. If it's broken, it may just fall out. Don't lose the spring. Wrap the coil spring around your new / or repaired console latch like so. Back in the lid there are two VERY small pin holes. Carefully feed the two posts on the coil spring into the console lid pin holes and snap the latch gently into place. It should look like this. Reverse the process and put the map holder back in with the 5 screws. If the spring is installed properly the latch will be "sprung" into a downward position. When latched, it'll sit in a downward position like so. The act of pulling up on it will unlatch it and allow you open the console lid. The plastic tab on the latch should catch on the plastic ledge cast into the console as shown. That's it. You've replaced, or repaired your center console latch. Reinstall the rest of the screws as necessary put your lid back on the console and enjoy your ride on step closer to perfection!3 points
-
But I figured I'd share and maybe it'll inspire a few others to reach out as well. Perhaps with enough of us contacting them asking for support, they'll throw us a few bones? Not sure, figured it was worth a shot. Here's what I sent, as a template: Hello Godspeed, I'm a huge fan of your products, my RX7 ran GS coilovers and my Mazdaspeed Miata will as well. I am writing on behalf of a tiny yet powerful community of enthusiasts who drive the 1986 through 1989 Mitsubishi Starion and Chrysler Conquest models. I don't know how familiar one may be with that particular marque but these cars are amazing and, while I am already in possession of coilovers, it would be amazing to see more support for these cars. With your help, we can keep a dying breed of car from fading away. The limit also doesn't have to be drawn at suspension: These cars are turbocharged from the factory but with limited support we are stuck performing lots of custom and one-off modifications. Godspeed turbochargers, intake manifolds, exhaust manifolds, radiators, intercoolers, brake setups, etc would all prove to be a huge benefit to our community and you would nearly have a monopoly on it as, mentioned previously, the support for our cars is slowly fading away each year. While our numbers aren't extreme, there are more than enough Starion and Conquest drivers to make parts manufacturing worth while, the passion from each driver would ensure that your sales numbers are adequate and that research, design and development costs are promptly met! I'm also sure that there are no shortage of persons who would either: 1. Be willing to let Godspeed use their car for testing. or 2. Have a second Conquest/Starion for testing purposes. I understand this request may be a bit extreme, but I promise that if you at least give us a shot at having some parts made, we'll return the favor with a rather sizable and loyal customer base. Thank you, David Adams3 points
-
I'VE JUST STARTED WITH THE G54B! It only gets better from here.3 points
-
clean it up or remove it, WE DON'T NEED THIS DRAMA ON SQC ! take it else where...3 points
-
3 points
-
Happy Veterans Day to my past and current brethren. Take some time off Drink a beer and revel In the glory of all that you have bled for.3 points
-
I like that my daughter took her first steps last night. But I hate that she will be much more difficult to contain now LOL.3 points
-
When will people open their eyes to the fact that we only invade countries to plunder their natural resources and give the rebuilding contracts to close associates. It has ZERO to do with anything remotely humanitarian. George Bush should be held accountable for what he has done to this country and this world. He is a lying, self-serving weasel and unfortunately only one name on a long list. They don't give two craps about us, why the heck would they care about someone halfway across the world.3 points
-
"Are you telling me that this sucker, is nuclear?" At least in mine, the fusable links and ETACS will fry if you hit 'em with 1.21 Gigawatts! -N8 http://i1234.photobucket.com/albums/ff408/n8tallica1/back-to-the-future-quest_zpsc89e0b9c.jpg3 points
-
Final deposit received. Here we go!3 points
-
http://assets0.ordienetworks.com/images/user_photos/1098190/GOP_Lynch_Mob_fullsize.jpg?6b7af3dd3 points
-
I'll try to find others from the event, they are poping up all over now.3 points
-
"Then God looked over all that he had made, and behold, it was good. And evening passed and morning came, marking the sixth day. Thus the Heavens and the Earth were completed in their vast array." Then God took a day off...just long enough for the serpent to convince the builder of this car that it was actually a good idea.3 points
-
I thought thats what he was saying...I wanted him to say it again so I could tell him he was retarded...3 points
-
Early years had them, and later years didn't. You are BOTH wrong. Get over it, stop acting like it really matters, and moderate yourselves. -Robert3 points
-
3 points
-
***UPDATED- CALENDARS SOLD OUT*** Original 50 sold; Second 25 also sold~~ ALRIGHT EVERYONE! Calendars are off to the printer. I'd like to say thank you for EVERYONE who submitted a photo. I hope there's no hard feelings among anyone who didn't get in THIS time, as next year people who didn't get in are more preferred (We'd like to showcase the variety of cars out there rather than just showing you the same few over and over.) A few things I learned this year doing this that I will improve upon next year: 1) I need to be more explicit with photo size requirements up front. A few of you submitted really great photos that were just too small to look good printed out (they appeared grainy) 2) I need to get a more accurate count of projected sales beforehand. 3) Next year id really like to collaborate with meet planners and get the meet schedule incorporated into the calendar. LUCKILY, all of these things are part of the learning curve and like any project, the next time I do this it will be much more fluid; resulting in a better finished product. It is my hope to continue doing this annually as I enjoy these cars and this community a great deal. Next years calendar should be even better and I hope everyone continues to take and send me great photos of their cars Thanks everyone for your patience, understanding, and support. So on to the product. What you're getting: --A 12 month, wall calendar starting with January 2012, going until December. Document Trim Size Photo Wall Calendar 11.00" x 8.50" 279mm x 216mm 1650 x 1276 pixels Paper Stock: Standard 100 lb text with premium glossy card stock. -- A "Bonus" Insert, with some commonly asked questions and fun facts about Starquests (U.S. import numbers, available colors per year etc) What its going to cost: $20 for 1 $15 for each additional calendar These return from the Printer sometime BEFORE 12/19/2011 and will be able to ship to you starting on that date. If you ordered one of the first 50, the calendar is on its way to you right now! (or already there) Paypal your orders to: Frenchi934@gatech.edu Here is a quick preview of the months: Cover: http://img843.imageshack.us/img843/9274/img1579js.jpg January: http://img809.imageshack.us/img809/1703/vegascruisefullsize.jpg February: http://img94.imageshack.us/img94/1774/img2798xq.jpg March: http://img4.imageshack.us/img4/3186/dsc0123xqw.jpg April: http://img690.imageshack.us/img690/552/nomadv2.jpg May: http://img15.imageshack.us/img15/9412/angleviewcopy1.jpg June: http://img825.imageshack.us/img825/8456/img2277e.jpg July: http://img69.imageshack.us/img69/4568/140742.jpg August: http://img256.imageshack.us/img256/3862/calendarshot.jpg September: http://img263.imageshack.us/img263/3785/sunsethsw.jpg October: http://img847.imageshack.us/img847/3572/88starionesirshpoct2010.jpg November: http://img41.imageshack.us/img41/5081/dscn0950x.jpg December: http://img835.imageshack.us/img835/8875/hpim0652.jpg3 points
-
so many people carry concealed weapons these days I am amazed when something like this happens where a couple hundred people are gathered and not a single person returns fire----this guy had body armor of some sort on so majority of peoples concealed hanguns probably would not have done much but maybe would have gotten the guy to cease his slaughter after getting hit a couple times----i will not sit here and say shoot for the legs or a head shot cause with all the chaos precision shots would be next to impossible in that enviornment-----another thing is hitting innocents when returning fire wich is problematic----all I know is stuff like this makes me feel better about always having a loaded handgun on my person anywhere its legal to do so----just my thoughts gig out3 points
-
http://i289.photobucket.com/albums/ll231/nomad1856/85-5%20Starion/P5122968.jpg3 points
-
http://i713.photobucket.com/albums/ww135/starquestJOE/P6300568.jpg3 points
-
http://i463.photobucket.com/albums/qq352/ucw458/wash/PIC_0897.jpg3 points
-
Engine swap is for those who don't have the skills to keep their 2.6 running well enough to not blow up. What you need for reliability is more than just correct parts but the ability and knowledge to do the required maintenance, build/install the engine and components correctly, and especially a proper tune. Quite a few members have done this very well, others were missing parts of the equation and blamed the car. -Robert3 points
-
Newbie Question and Answer Guidelines: 1. SEARCH FIRST, please be respectful of the members here by searching first to see if your question has already been asked/answered. Members devote their time and knowledge for free to you, to help you keep your car on the road. A keyword search should be done first before posting a new question. *Click here to start a keyword search* 2. Familiarize yourself with the location of pertinent information "pinned" at the top of this section, such as the FAQ's (Frequently Asked Questions), or the link to download the FSM (Factory Service Manual) 3. Only make a new thread if the search has not solved your issue. When making a new thread give detailed information about your problem and be sure to include the following: year of your car, 5spd or auto, and any modifications. Model years that are similar are: 83, 84-86, 87-89, so someone's issue with a similar year car will likely apply to yours. 4. We encourage a helpful atmosphere and will not tolerate abusive/unhelpful posts. If you see an abusive post, notify a moderator by using the "Report" button at the bottom right corner of the post, or by sending a PM (Send a Private Message) to a moderator (The Moderating Team). -Robert3 points
-
Welcome to StarQuestClub.com!! Please orient yourself with the Site Policy and be sure to follow it. If you have any questions about the policy or membership, you can PM (Send a Private Message) to a moderator (The Moderating Team). In order to get you started here at StarQuestClub, we have created the newbie section. New members are limited in posting in other sections until 10 posts, because posting in the newbie section is encouraged. Just follow these three easy steps: 1. The first thing you should do is create an introduction thread to say hello (yes, it's you we're looking for) so we can welcome you. Be sure to post pictures of your car if you have them so that we may enjoy it too. Add yourself to the Member Locator Map as well. 2. The second thing you should do is download the FSM (Factory Service Manual) and familiarize yourself with it as well as the location of other pertinent information, such as the FAQ's (Frequently Asked Questions), "pinned" at the top of the Newbie Q&A forum section. 3. The third thing you should know is we are here to help you, but please be respectful of the members here by searching first to see if your question has already been asked/answered. Members devote their time and knowledge for free to you, to help you keep your car on the road. A keyword search should be done first before posting a new question. *Click here to start a keyword search* -Robert3 points
-
It is set up now with a limit of 5/day. Jimmy3 points
-
Welcome, you can add your location to the member map (for all you stalkers out there) by putting your zip code in your SQC profile. Check it out here: Member Map -Robert3 points